
Enable Rspamd in ISPConfig
The final step requires that you log into ISPConfig as 'admin’ user.
In ISPConfig navigate to System > Server Config > Mail.
There you change the value of the field Content Filter from Amavisd to Rspamd and press the save button at the bottom of the page. ISPConfig will start to reconfigure all mailboxes for Rspamd now.
When you go back to System > Server Config > Mail, then you can see some new fields where you can read and set the Rspamd password.

Make Rspamd Dashboard accessible from outside
The Rspamd dashboard is on port 11334 on localhost, so it can not be accessed from outside. In this chapter, we will create a website in ISPConfig and add a proxy configuration. The configuration differs between Apache and Nginx web server, use the chapter which matches your installed web server software.
Apache
Enable the Proxy Module and restart apache.
a2enmod proxy
systemctl restart apache2
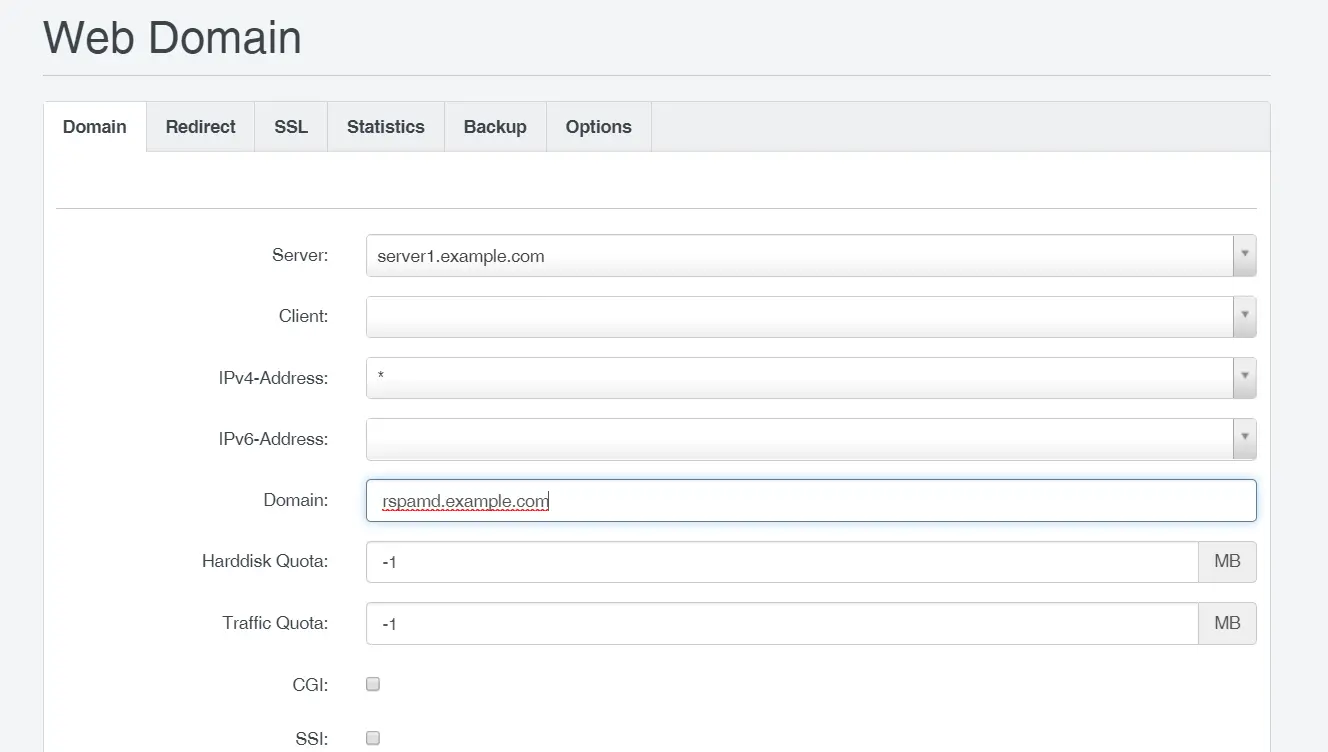
Then log into ISPconfig and create a website which will get used to access the Rspamd GUI. You are free to choose the domain name, I will use rspamd.example.com here. You don’t have to enable any programming language or other options in that site, just leave everything at the defaults. Enabling SSL and Let’s encrypt is highly recommended though.

Go to the Options tab of the website and enter the following configuration into the Apache Directives field. For Apache 2.2, use:
 <Location /rspamd>
 Order allow,deny
 Allow from all
 </Location>
 RewriteEngine On
 RewriteRule ^/rspamd$ /rspamd/ [R,L]
 RewriteRule ^/rspamd/(.*) http://127.0.0.1:11334/$1 [P]
For Apache 2.4, use this instead:
<Location /rspamd>
 Require all granted
 </Location>
 RewriteEngine On
 RewriteRule ^/rspamd$ /rspamd/ [R,L]
 RewriteRule ^/rspamd/(.*) http://127.0.0.1:11334/$1 [P]
Now you can access the Rspamd GUI with a web browser https://rspamd.example.com/rspamd. You will get asked for a password, use the password that you generated during Rspamd installation.
Nginx
Log into ISPconfig and create a website which will get used for accessing the Rspamd GUI. You are free to choose the domain name, I will use rspamd.example.com here. You don’t have to enable any programming language or other options in that site, just leave everything at the defaults. Enabling SSL and Let’s encrypt is highly recommended though.
Go to the Options tab of the website and enter the following configuration into the Nginx Directives field.
location / {
 root /usr/share/rspamd/www/;
 try_files $uri @proxy;
}
location @proxy {
proxy_pass http://127.0.0.1:11334;
proxy_set_header X-Forwarded-For $proxy_add_x_forwarded_for;
proxy_set_header Host $http_host;
}
Now you can access the Rspamd GUI with a web browser https://rspamd.example.com/. You will get asked for a password, use the password that you have set for Rspamd in ISPConfig.
Rspamd GUI
Now you can access the Rspamd GUI with a browser and get detailed statistics about the spam filter rate and throughput.
 ISPConfig has been reconfigured to use Rspamd instead of Amavis to scan for spam emails. Rspamd is also used for Dkim Signing.
Disable Amavis
Finally, we stop and disable amavisd service:
systemctl stop amavisd-new
systemctl disable amavisd-new
Conclusion
Rspamd is a modern high-performance spam scan software for Linux servers which delivers very accurate filter results. ISPConfig supports Rspamd as spam scan unit since version 3.1.15. This tutorial shows how to replace amavisd.new with Rspamd on an ISPConfig 3.1 server.